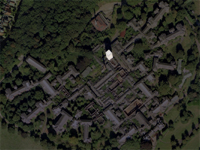
THE WATER TOWER
LAST VIEWS FROM THE APEX
"There they stand, isolated, majestic, imperious, brooded over by the gigantic water-tower and chimney combined, rising
unmistakable and daunting out of the countryside - the asylums which our forefathers built with such immense solidity to
express the notions of their day" - Enoch Powell, The Water Tower Speech, 1961

|
|
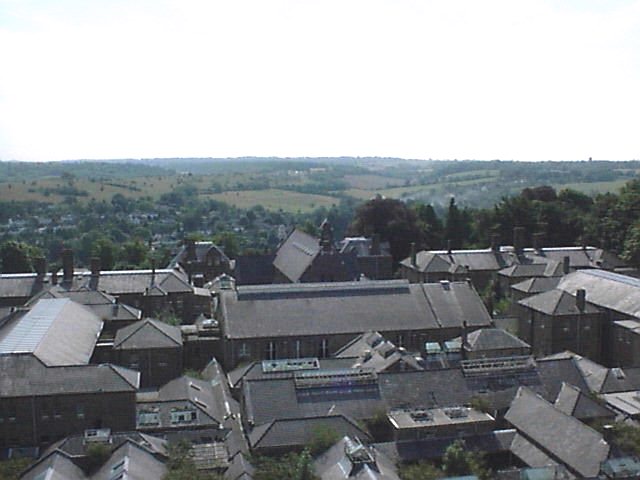
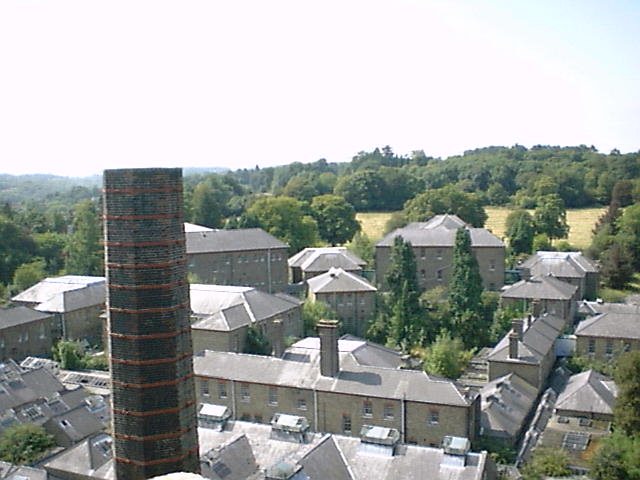
Figure 1: Cane Hill Panorama
|
© Marlon Bones 2008
|
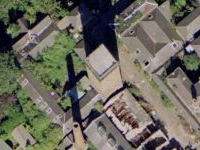
THE END IS NIGH
The water tower afforded a perfect vantage point to track the slow demolition of the former
buildings of Cane Hill. The demolition spread from the tower’s base, and after two months of crunching work,
had obliterated many unique parts of the complex.
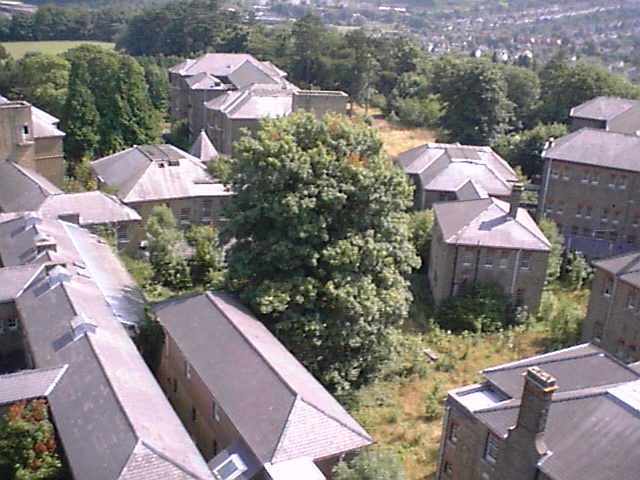
These pictures were taken during my last visit to the hospital in August 2008. I’ve also
included Andrew Tierney’s photographs taken from the same vantage points during the eclipse of August 1999,
almost exactly nine years previously. His photographs show an almost unrecognisable cluster of rooftops
which gradual rot, sudden arson and terminal demolition have altered significantly over the years.
Despite the destruction, the demolition also had its advantages. It revealed some of the anatomy of
Cane Hill, peeling back the obscuring buildings, and clarifying points of construction and architecture which
otherwise would’ve been lost.
(Note: Andrew's full-sized photographs can be viewed in the archive of his website).
|
|
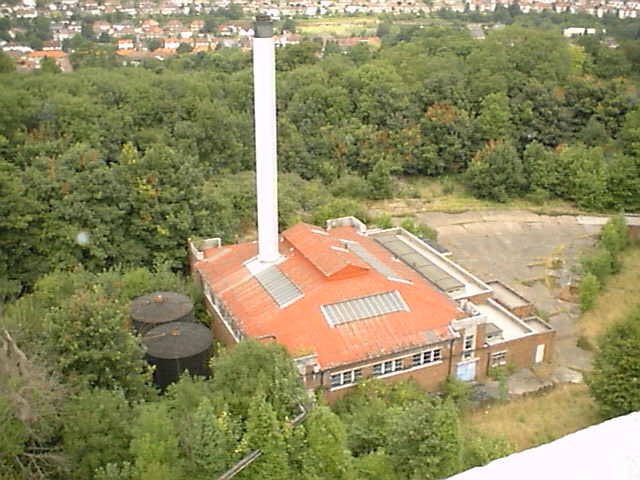
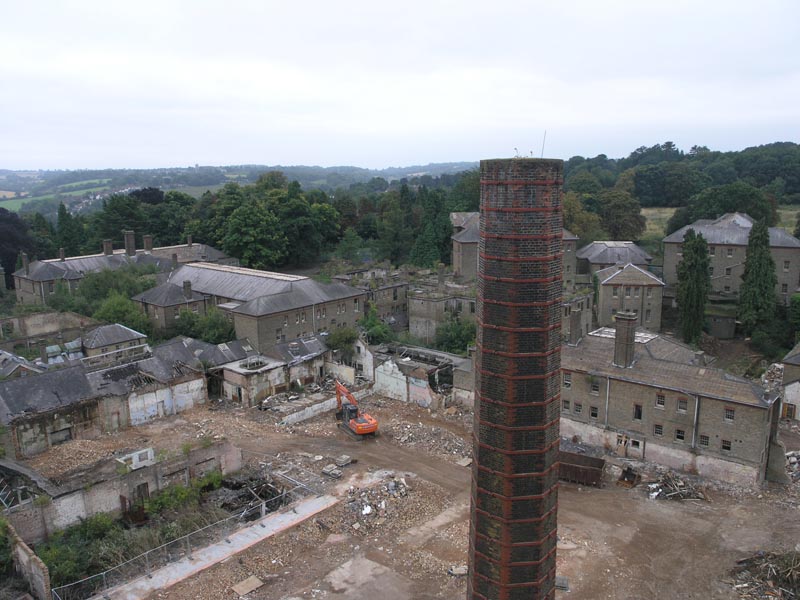
Figure 2: View North: New Boiler House
|
© Simon Cornwell 2008
|
THE NEW BOILER HOUSE
© Andrew Tierney 2002
|
|
The new Boiler House was never explored thoroughly by any of the urban explorers who
visited the complex. The asbestos warnings plastered over the doors were enough of a deterrent
to the early visitors, whilst later adventurers (including myself) used the building as a
handy leg-over the perimeter fence.
The building replaced the earlier Boiler House which was the immediate southern
neighbour of the water tower. Unfortunately the original Boiler House and Engine House were
destroyed by fire in 2002, and were never explored thoroughly either.
By August, the demolition firm (Squibb) had removed the boilers and roof leaving
just the skeletal outer walls of the building.
|
|
|
Figure 3: View East: From Left: Ward F (missing roof), Ward E, Ward D and half of Ward C.
|
© Simon Cornwell 2008
|
MALE WARD DEMOLITION
© Andrew Tierney 2002
|
|
For two months Squibb’s demolition squad of bulldozers, nibblers, drills and demolition workers burrowed
into the male half of the hospital. Ward J (Nightingale) had been completely obliterated, allowing access into the internal
courtyard of the other wards.
The unsafe and rapidly unpeeling horseshoe corridor had been swept away (the white walls
revealing its former route) whilst the dormitory of Ward C (Rossetti/Ruskin) was nothing more than a shattered wall.
|
|
|
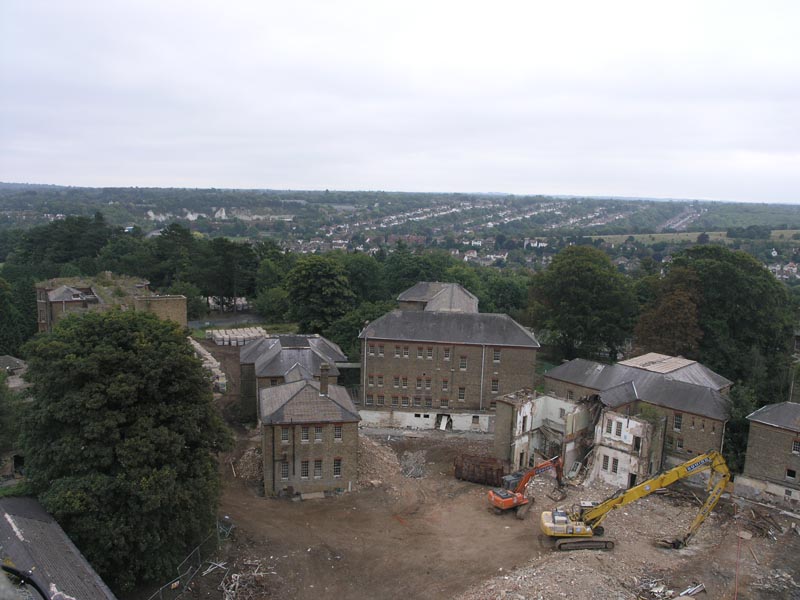
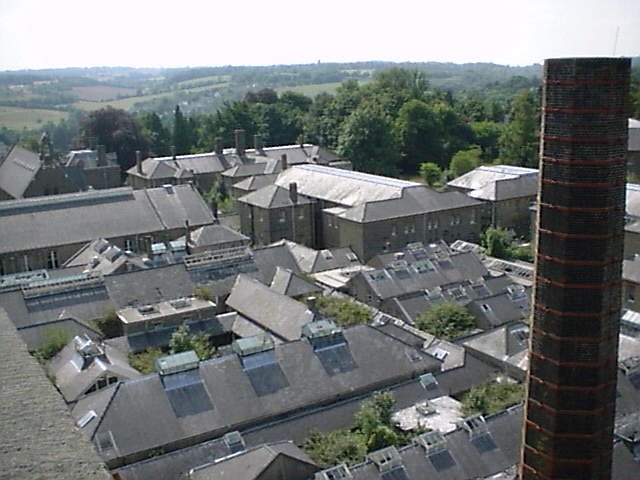
Figure 4: View South East: Central Core
|
© Simon Cornwell 2008
|
CENTRAL CORE DEMOLITION
© Andrew Tierney 2002
|
|
Andrew Tierney’s photograph shows a cluttered sea of rooftops whilst my shot shows a ravaged
landscape punctuated by huge swathes of green. The budding flora hides most of the soot blackened buildings
destroyed by the arson attacks in the early 2000s, but the trimmed ruin of the Recreation Hall can still
be clearly seen.
The Laundry and Wash House have been completely demolished giving an unobstructed view of the
Steward’s Stores. Its blackened interior (surrounded by a hastily erected wire fence, bottom right) shows
the drop into the basement below. The fire damage resulted in the boarding of all access routes and no
urban explorer ventured inside.
Which was a pity as the Steward’s Stores basement was connected by a large tunnel to the service
road at the back of the hospital. The exact geography and route of this tunnel will now not probably be known,
but another part of it can be glimpsed (bottom left) with a collapsed roof by the former Dressing Rooms of the Male Baths.
|
|
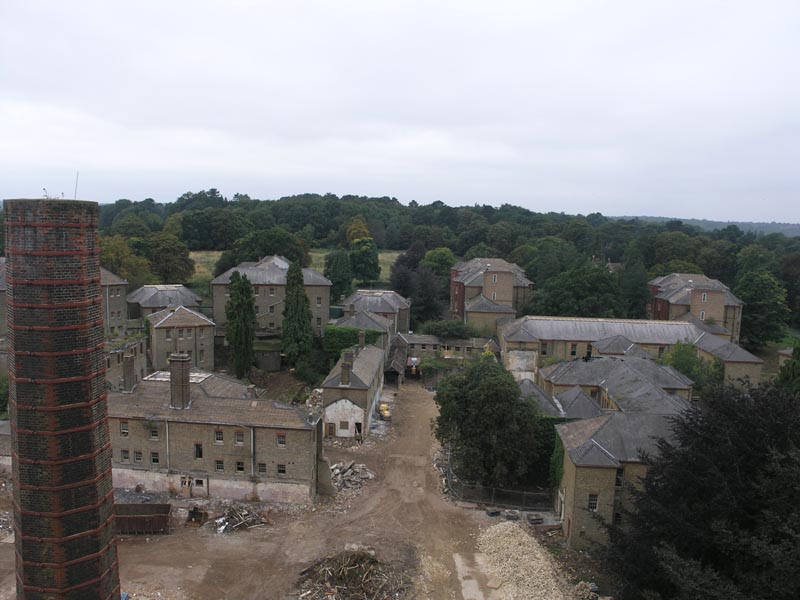
Figure 5: View South: Ward A, Ward C (damaged), Ward D (obscured), Ward E and Ward F.
Ward M in foreground.
|
© Simon Cornwell 2008
|
REMAINS OF THE LAUNDRY
© Andrew Tierney 2002
|
|
The sunken basement of the Steward’s Stores (bottom left) is clearer in this shot to the south.
The outlines of the former Laundry and Wash House can still be seen whilst the majority of the former Female
Baths has been demolished.
All the male wards have survived the demolition so far, with Ward M (Mapother) in the foreground to the right
of the chimney.
|
|
|
Figure 6: View South West: Ward F, Ward G, Ward H, Ward J, Ward K with Ward L to the right.
|
© Simon Cornwell 2008
|
MALE WARDS
© Andrew Tierney 2002
|
|
Squibb’s burrowing demolition workers have cleared a way along the route of the former corridor,
taking out the Female Servant’s Dormitory to the left (for access into the Female internal courtyard) and the
Female Association Room to the right.
The male wards and their half of the horseshoe corridor were still all in-situ at this time.
|
Simon Cornwell
8th February 2010

Return to The Cult Of Cane Hill
|
